Customizing the Icon Menu
Introduction
Synapse provides you with the ability to customize icon menus and do any of the following:
- Create a new icon menu page and then add the icons that are most useful to you.
- Copy an existing icon menu page, which can then be renamed.
- Delete an icon menu page.
- Rename an existing icon menu page.
- Change the location of an icon in an existing icon menu page.
- Replace an icon with a different icon from an existing icon menu page or from the List context menu.
|
Note: |
|
Steps
- Right-click the image to display a context menu..
- Select Icon Menu.
- Right-click a pre-existing icon or a blank icon space for editing.
A yellow border around the icon indicates that you can edit this icon.
The List menu displays. - Select an option in the List menu to replace the icon you chose to edit.
- To access the icon submenu options:
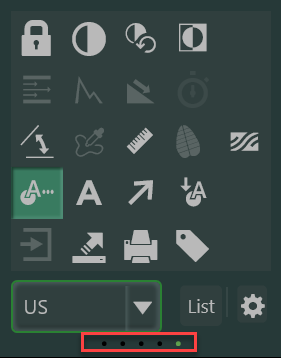
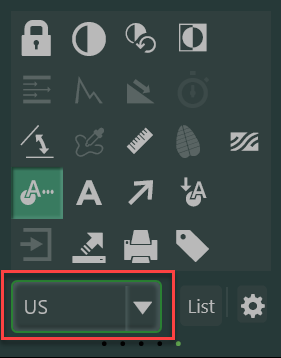
- Click the drop-down Icon Menu list to view the available modalities.
- Right-click a modality to display the Icon submenu options for editing. The submenu provides a list of options for editing.
- Do any of the following:
- Select Create New.
- Synapse creates a new icon menu page that you can customize with icons you select.
- Select Make a Copy.
- Synapse creates a copy of the icon menu page and adds it to the list as New_Copy.
- Complete the steps in the next row to rename the icon menu page.
- Select Rename.
- In the Rename dialog box, enter the new name.
- Click OK.
- Select Move Up.
- Select Move Down.
- Select Delete.
- In the Delete dialog box, click Yes to permanently delete an icon menu page.
- To exit editing mode and close the icon menus, do one of the following:
- Click outside the icon menu or submenu.
- Press the ESC key on your keyboard.
If you want to do this... | Choose this option... |
|---|---|
Create a new page that does not contain any icons. | |
Make a copy of an existing icon menu page. | |
Rename an existing icon menu page. | |
Move an icon menu page up in the drop-down list. | |
Move an icon menu page down in the drop-down list. | |
Delete an icon menu page. |
Results
Icon menu customizations persist on a per user basis.
Additional Options
The last icon menu page selected for a modality persists. To access the other icon menu pages, complete one of the following steps:
- Use your mouse to scroll backward to the next icon menu page or scroll forward to the previous icon menu page.
- Use the drop-down list option to change
to a different icon menu page:
- Click the page indicator to select a different
icon page: