Creating an Angle
Introduction
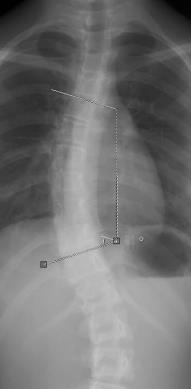
Use the Angle option to measure the angle between two intersecting lines on an image or the angle between two lines that do not intersect such as an angle of a spine deformity. Example A is Cobb Angle.
Example A
Steps
- Right-click the image to display a context menu.
- Select Annotations> Angle.
- Do one of the following:
If you want to do this...
Complete these steps...
Create a 3 point angle (intersecting angle).
- Click and drag to create the first line of the angle.
- Click and drag to create the second line to complete the 3 point angle.
Create a 4 point angle (non-intersecting angle).
- Click and drag to create the first line of the angle.
- Click and drag to create the second line.
- Click the starting point of the second line and drag to the second end point. A dotted line connects the two line and calculates the angle (Cobb angle) between them.
|
Note: |
To assist in creating true, straight horizontal or vertical lines, the line will display in staggered stair-steps to guide the placement of the endpoint on the exact same X- or Y- axis value. |
Results
For the 3 point angle, the angle measurement displays in degrees.
For the 4 point angle, a dotted line automatically connects the two lines and calculates the angle in degrees between them.
Additional Options
Use any one of the following options to create an angle:
- Click Angle
 on the icon menu.
 - Angle keyboard shortcut: G + left-click.